Tinderbox Video - Blogging with Tinderbox
| Level | Intermediate |
| Published Date | 7/3/21 |
| Revision | 2 |
| Revision Note | 4/7/21 - see Note: below. I’ve updated the action code in the file. |
| Acknowledgements | Dave Rogers @dmrogers |
| Type | |
| Tags | 4CKMEl, 4Cs of Knowledge Management and Exchange, Blogging, CMS, Content Management System, FTP, Tinderbox, Web Hosting, aTbRef |
| Video Length | 45:21 |
| Video URL | https://youtu.be/VFoGBCMyNIg |
| Example File | |
| TBX - L Blogging with Tinderbox R2.tbx (172.0 KB) | |
| TBX Version | 8.9 |
| Instructor | Michael Becker |
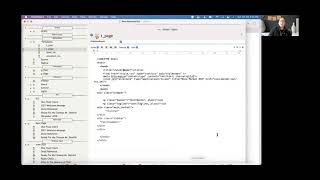
In this lesson, you’ll learn about and see a workflow on how to create a blog comprised of linked-static HTML files created and published with Tinderbox.†
I interview Dave Rogers (@dmrogers) and long-time Tinderbox user—he has been using Tinderbox since version 1)—we discuss his workflow on how to create and manage a blog with Tinderbox. In this case, Tinderbox acts as the blog content management system (CMS). Dave is using it to manage the blog (website) Static HTML layout, posts sidebar and more. Please see the NOTE below RE two points regarding the evolution of Tinderbox and the translation of old syntax to current syntax.
In Dave’s workflow, what’s needed:
- Tinderbox
- FTP client
- Domain
- Website hosting service
NOTE: Dave has been working with Tinderbox since version 1. He has a workflow that does the job for him. He is not an HTML expert, nor really care to be one. He just wants to work. And, this blogging workflow does work for him. One of the beautiful things about Tinderbox is its backward compatibility.
For example, in Dave’s template, you’ll see the following code to pull in the text from the file name “Banner” and insert it without any formatting.
<p class="banner">^text(Banner, plain)^</p>
Today, in Tinderbox, we would not use this convention, even though it works. The current way to do this same this would be to use the ^value()^ comment.
<p class="banner">^value($Text("Banner"))^</p>
Another example, in the action code you’ll see this $PublicationDate = ("today"), which works fine, but it would be better to write it like this $PublicationDate = date("today"). Similarly, you’ll see $Prototype=("p_Post");. Addin the ( ) is no longer necessary, but it works. Today you’d rite it like this $Prototype="p_Post";.
Here are some additional improvements. At 22:06 in the video Dave and I start brainstorming a way to automate his file creation, i.e. adding action code. Here is some better code for executing what we were discussing:
$PublicationDate = date("today");
$PermaFile=$Name(parent).replace(" ","_");
$Prototype="p_Post";
Also, I’ve updated the same file so that we don’t need to manually edit the file export name, here is the code for that:
$HTMLExportFileName=$Name.replace(" ","_");
$EdictDisabled=true;
†This lesson does NOT cover how to post to database-driven blog, e.g. one hosted in WordPress or a similar service (we’ll cover that later).
