Is anyone using Aeon Timeline with Tinderbox? I as I’m in the (private) beta. Obviously, I can’t discuss what’s in it (new features). But, if you’ve any particular problems with transferring data to/from AT v2 I’ll try and investigate alongside my own tests.
Hello Mark, I’m recently new to TB by a couple of weeks (much appreciation for your invaluable, updated reference site) and have used AT since it came out. My current need involves a multi decade storyline with multiple story arcs and multiple events. Unlike your April 17 post, I’m looking to export from TB to AT. Since TB exports in HTML and AT imports in CSV, I’m not sure if my needs can be addressed as this import/export problem seems to be a negative gating item. Unless TB can add CSV export function. Nonetheless, what I’d like AT to do would be to take the Note Title and import it into the AT Event Title field; import the TB Note’s date attributes into the comparable AT Events Range fields; and import the Key Attributes of any Note into what would be the equivalent of the AT Event Values Tag field. The latter field may need to be expanded somewhat. In other words, I’d like to use the conventional CSV mapping schema to import selected TB attributes and KeyAttributes into their logical counterparts in AT2/3. It may be that that the fields in the AT Events Role tab should also be able to be mapped, but for now, in concept, these can be filled in manually.
To quite true, Tinderbox can export in pretty much ant format you can define (apart for binary formats). You just define the templates for CSV. If you need help on how to do that just ask.
I’ve certainly imported into to Aeon Timeline since v1. I don’t use Aeon Timeline—at this point it’s mainly for checking import/export.
I’ve added a few basic hints here, with respect to templates.
Also note that Aeon Timeline v3 will be a lot more complex terms of views than v2. My experiments thus far are mainly about importing/exporting pure timeline data as opposed to more obscure event features.
It’s very easy to export CSV from Tinderbox if you can avoid pathological cases such as multiparagraph cells and cells with quotations. Even if you need such oddities, it should be straightforward.
I will make a stab at exporting CSV using your TBref hints, and if not successful will take you up on your offer of assistance. From your comment “that Aeon Timeline v3 will be a lot more complex terms of views than v2” does that translate to, for the purposes here, there will be more flexibility in mapping CSV “event features” to v3 both in terms of numbers of events and where they are mapped to?"
I don’t believe so and Aeon Timeline v3’s still in beta. I think the import method un-changed from v2 in general approach. In general approach, despite import/export I think Aeon Timeline is seeing itself as a total environment rather than part of a tool chain. Not that it detract’s for the app in general.
For export, I’d start by making a list of the AT fields I want to populate via import and use import of any old CSV file to see if the AT import dialog exposes the desired fields. If you need custom AT fields, make them before testing import.
Next, I’d look at which Tinderbox attributes will supply the data. Make a list of the names of those attributes unless it is few enough to keep in mind without a list. Now, do any of those attributes’ data need transforming so Aeon Timeline can use it correctly? If so, work out what those transforms are; my earlier post gives some generic ideas.
At last, you should be able to start building the templates without having to break off and figure out an input. All that might seem complicated, but it is just a simple matter of working it all through and once done the first time you’ll see how all the pieces fall into place…
Using atbref9”s “ExportingTabular data as Tab-delim or CSV” and
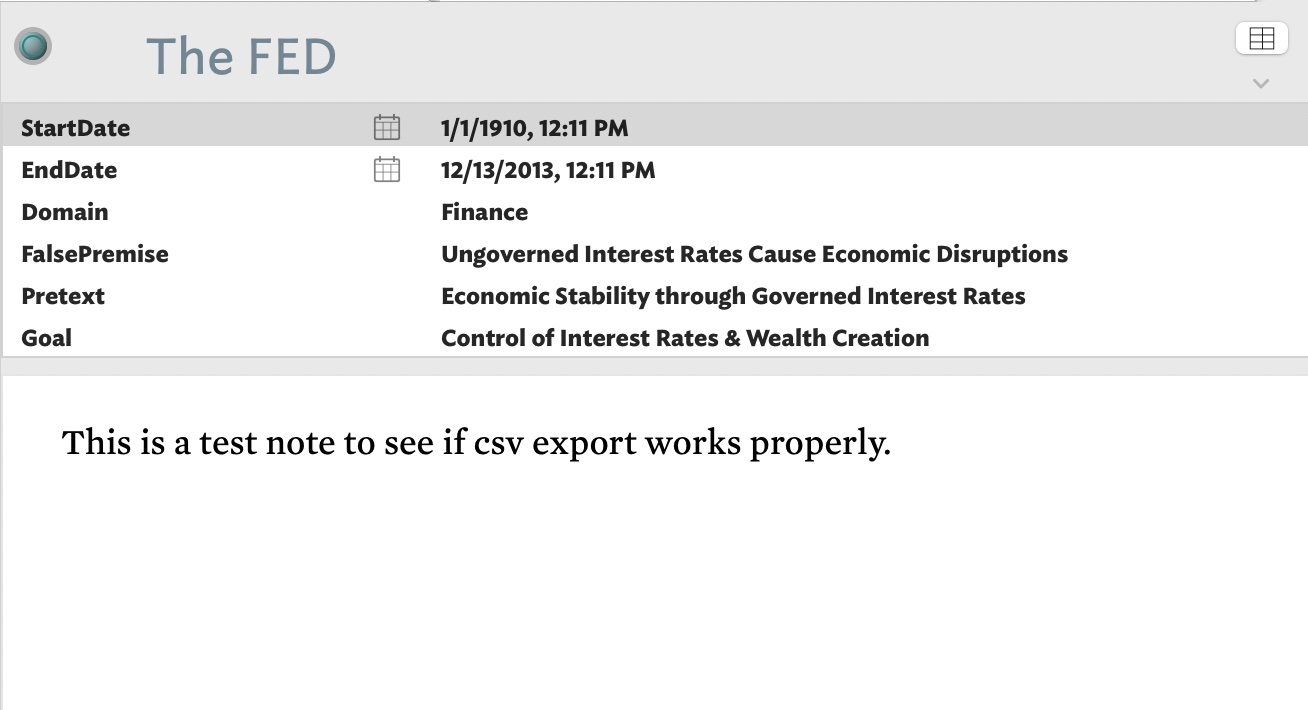
“Export templates are notes” reference pages I’m able to export a .csv file that, if it populated the values under the column headings, would be able to be read by AT2. However, looking at the .csv file in a spreadsheet, I can see the column headings but not the values. A weird thing is the column heading for the “FalsePremise” column heading has quotes attached. No idea how that happened. It shouldn’t have.
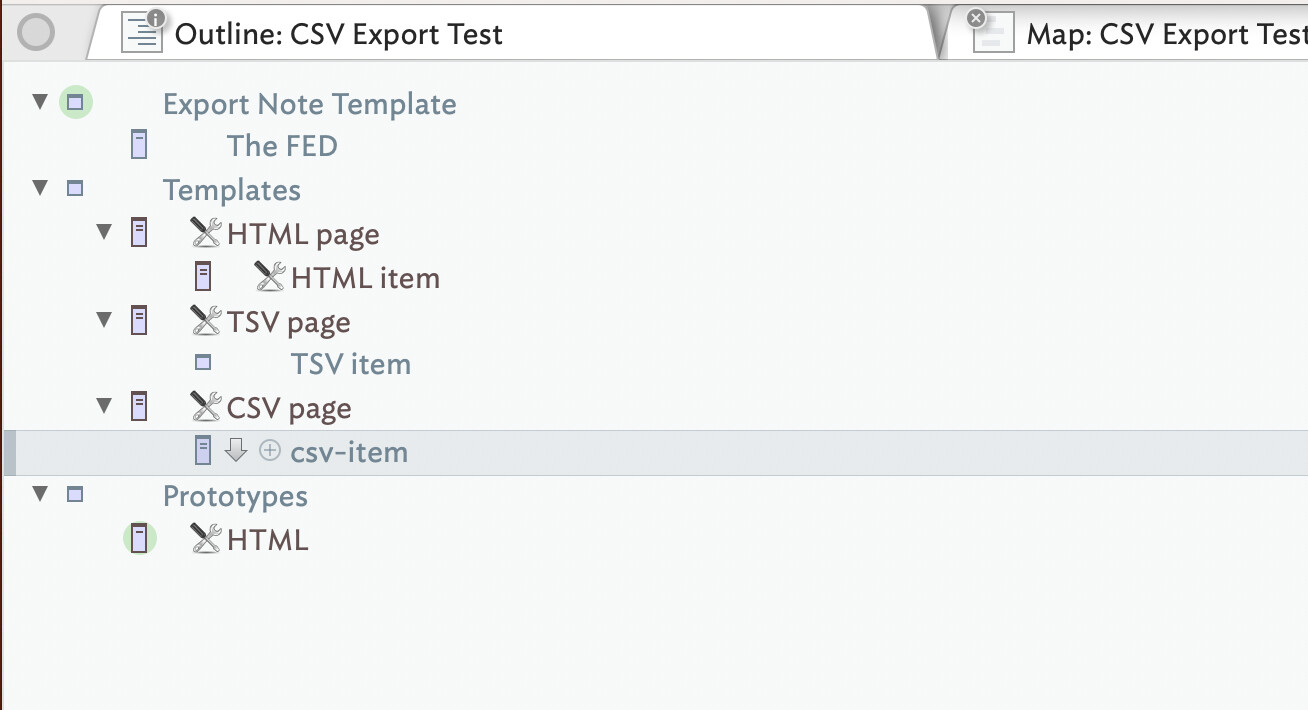
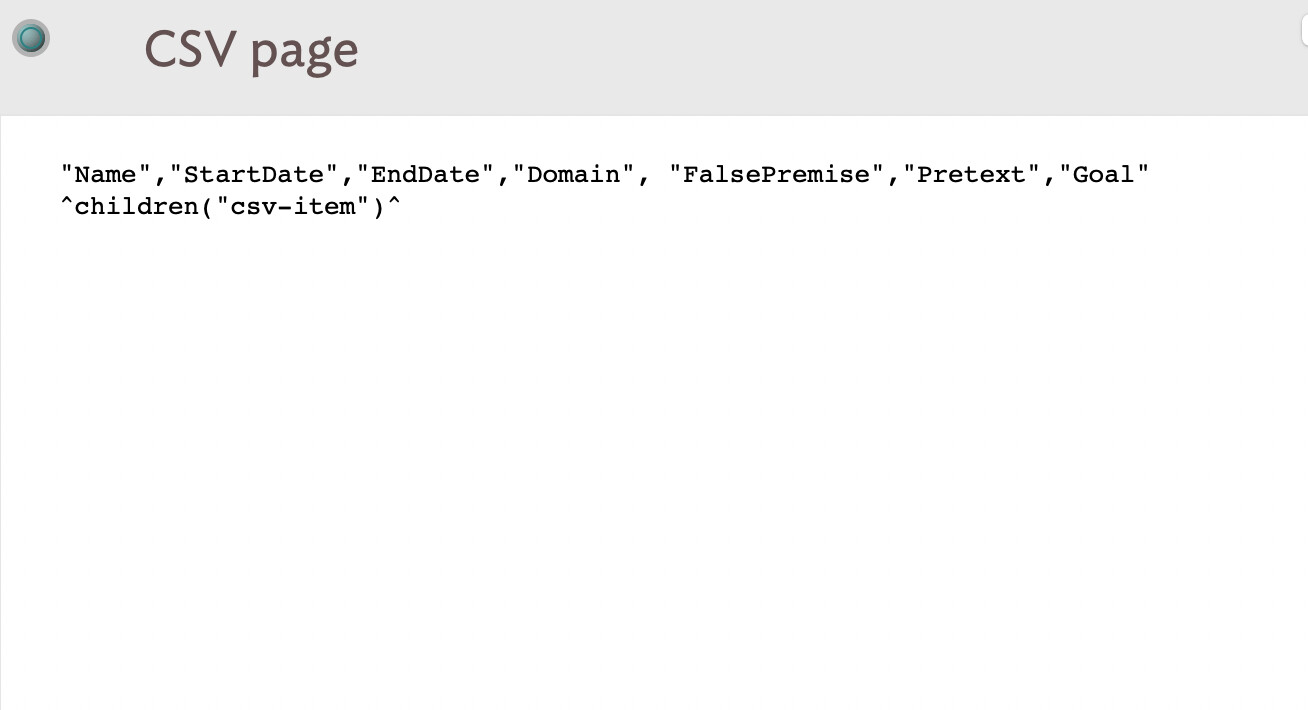
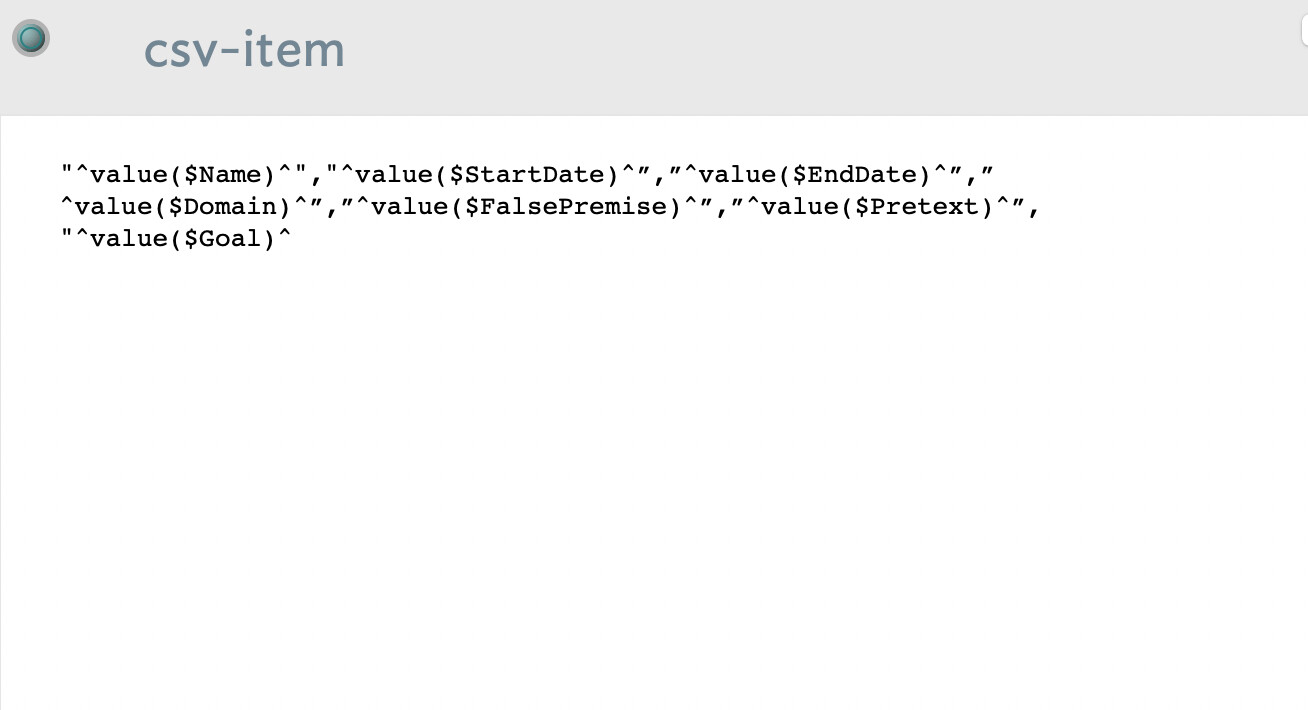
Attached are screenshots of the note with attributes, an outline view of the note and export templates, the “CSV Page” note and the child “csv-item” note. I noticed in your syntax for the child template that there is no " at the end of the code before the [Return] and that’s why that " is omitted in the “csv-item” syntax.
So, the problem is why do you think the values in the columns aren’t appearing in the exported .csv file?
In case this would be helpful attached is the file with the note and export notes
CSV Export Test.tbx (104.7 KB)
Thanks, the file is really helpful as the issues seem to be the result of some false starts/misunderstanding which are stopping things working.
Looking at the file, there are lots of small incremental errors that I’ve fixed. Rather than plod though the errors in detail, see the amended version I’ve made: CSV Export Test1.tbx (119.1 KB)
.
The file now looks like this (Text pane’s Export sub-pane selected to show CSV data):
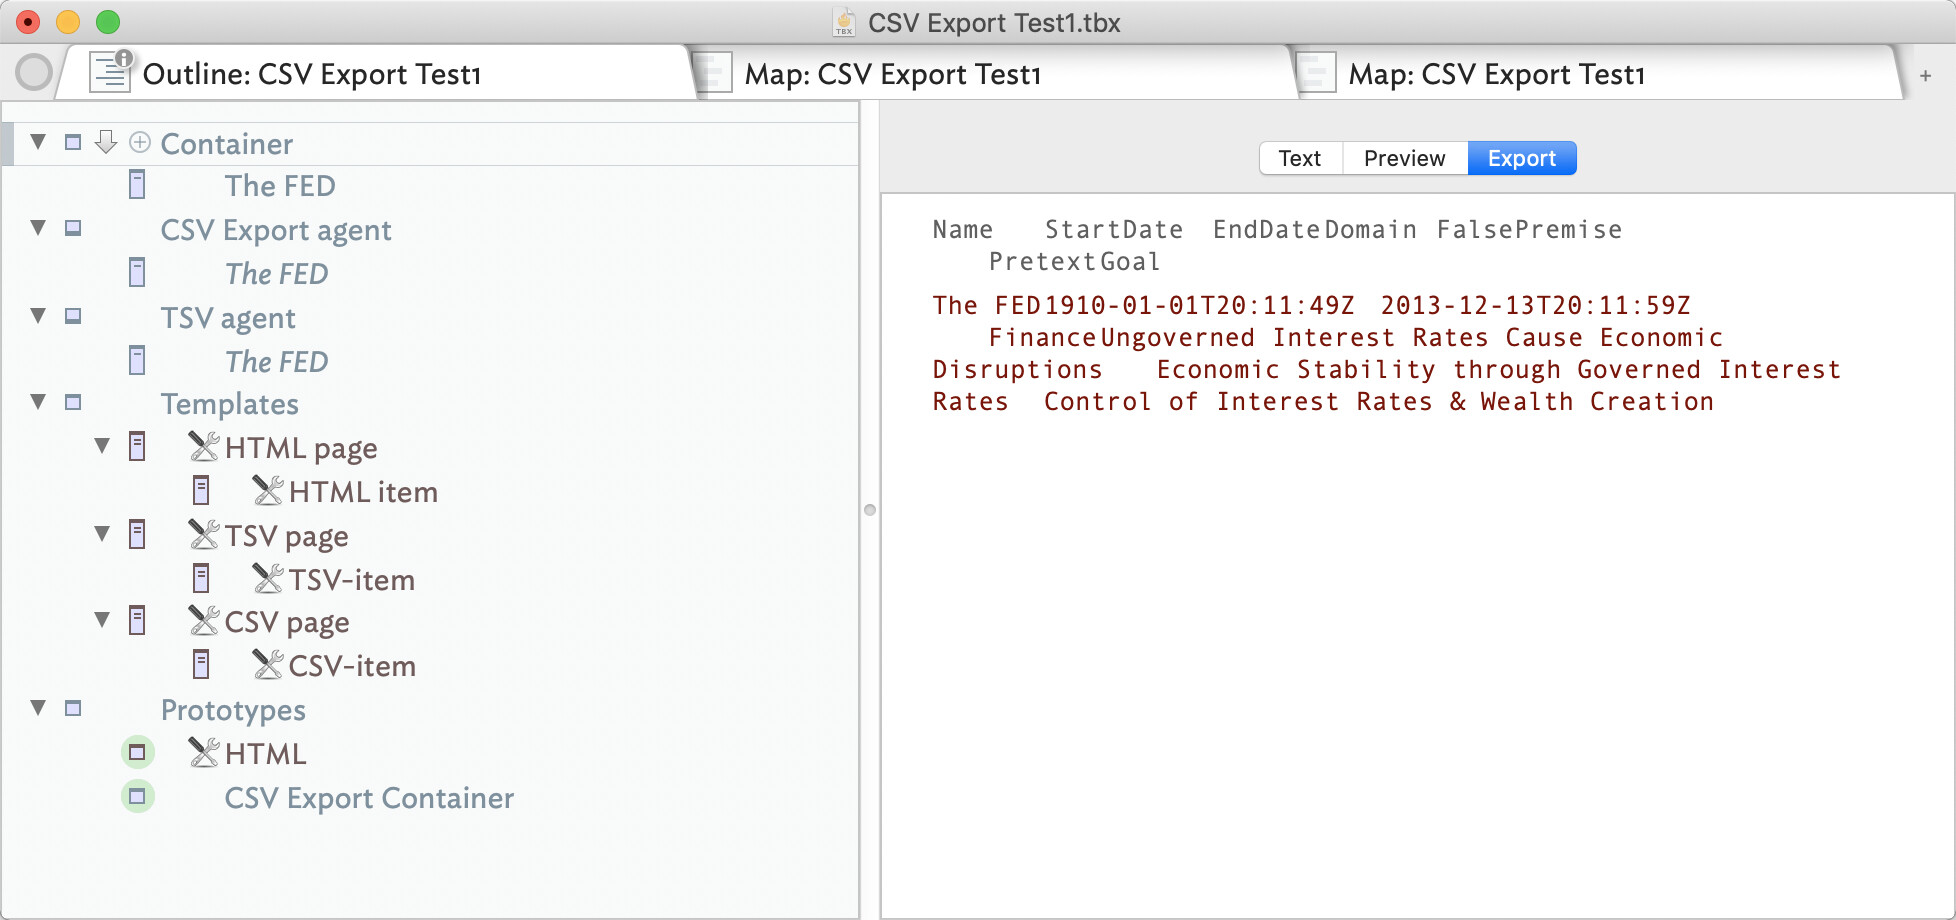
In the picture you will see the data exporting. I’ve added container and agent based examples.
The main reason your export failed is you had made the export container “Export Note Template” into a Template which was not appropriate. You’d also got naming errors with some templates (names are case-sensitive. Nesting templates is a visual organisational affordance, but note whilst the /Template' container’s OnAdd sets the ‘HTML’ prototype for new notes, for children of such notes you will need to set the prototype manually.
Tip: make new templates as siblings, then demote them. Template notes should ideally be unique across the current doc. Also, only add $Text to templates after you’ve set the template otherwise you’ll need to reset the $Text. Using consistent case in the names of templates, especially when used ‘paired’ as here. So
TSV...as opposed to bothTSV...andtsv....
Tip: By placing prototypes inside the
/Prototypescontainer you are less likely to make errors as above, although there is no formal requirement to do this.
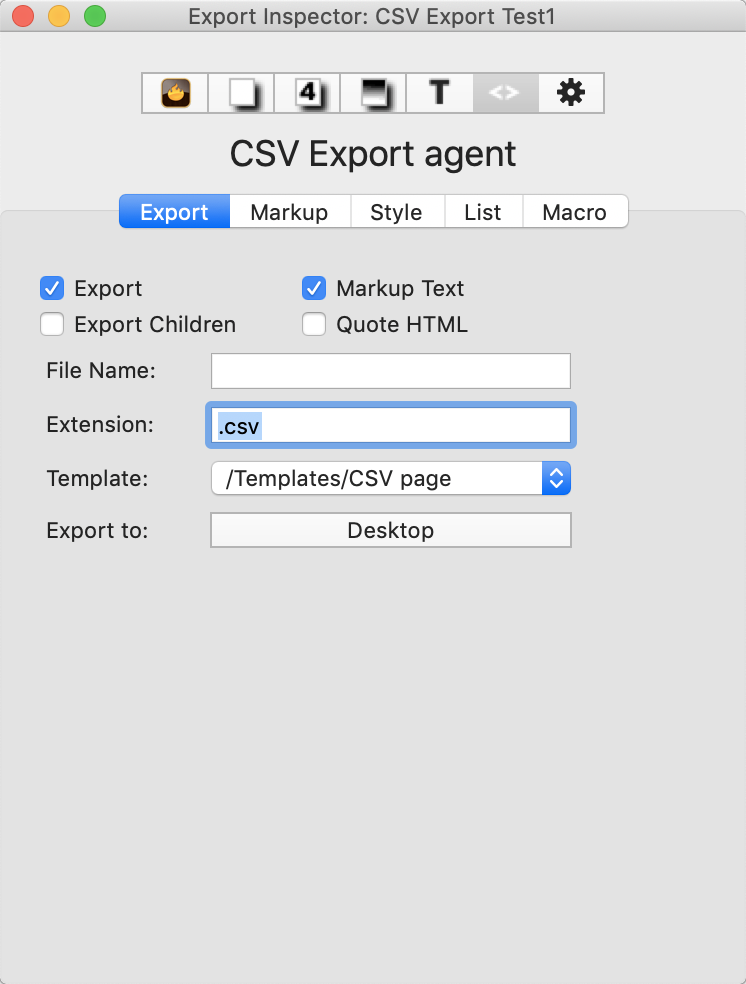
If a container is only ever going to be used for one type of (non-HTML) export then it is a good idea to set the exported files name and extension via the Export Inspector:
I hope that helps. ![]()
1 Like
Thank you, Mark. Since I am, as mentioned, new to TB and not a coder, I still have many questions about the code to export in .csv format. Thank you for bearing with me. Because I’m not in a position to efficiently ask you questions and gain clarity in an iterative way, the best way for me to learn is to have a file that does what I want it to do because then I can reverse engineer “what code goes where” and learn the code syntax from the example. Earlier, using your atbref9 examples I was able to select the note to be exported and then export it as a .csv file even though the values didn’t get exported. With the CSV Export Test1.tbx file I am unable to find a file to export that allows selection of “Export Selected Note” with a .csv file extension. So, in your file, what needs to be done so that the note entitled “The FED” located in the “Container” can be exported - assuming that is even the right question to ask!
With this outer-wrapper template & per-row-item template combo, you export the container . In the real world “TheFED” would just be one event of many.
Select note “Container” and use File ▸ Export Selected Note. What out put do you get.
Not try the same, in turn with each of ‘CSV Export agent’ and ‘TSV agent’. Again, what result do you get.
Don’t worry about being a ‘coder’. As it happens, I’m not one either. No formal training at all: just what I’ve picked up from experimenting and reading availalbe documents. ![]()
“Select note “Container” and use File ▸ Export Selected Note. What out put do you get.” A dialogue box entitled “HTML Export Folder” that has a Save As option “Container.html.”
For ‘CSV Export agent’ a dialogue box entitled “HTML Export Folder” that has a Save As option “CSV_Export_Agent.csv”. Viewing via spreadsheet this file has the proper Attribute headers and the columns are properly populated with the corresponding Attribute values. AT2 does import the file and presents its contents properly.
For the “TSV agent” a dialogue box entitled “HTML Export Folder” that has a Save As option “TSV_agent.txt”.
So, I did have the file I needed but didn’t know it. Thank you for that. I’ll go through your writings and put them together in a way that makes sense for me in terms of a step-by-step approach that I’m sure will generate a few more questions later on. In the meantime, I notice that the notes in your file always show the "Text’, “Preview” and "Export tabs above the Note’s name, whereas the tabs on my Notes disappear shortly after the Note is made. I’ve searched for a setting for this but am unable to find it. Would you give me guidance on this?
That’s odd. Unless you’ve changed something the suggested filename is “Container.csv.” and not “Container.html.”: note the different file extension. That said you can always set whatever extension you like when you save the file.
See the Window menu, and use the Show/Hide Text Pane Selector option. These controls are hidden as they scare some people who never export. However, the document remembers the show/hide state. For documents using export, I generally turn these tabs on and leave them one.
" Show/Hide Text Pane Selector" if only everything was this easy. Thanks.
This is a shot of the Export Inspector’s Export pane for the Container as I received it from the file you sent:

When I changed the Extension to .csv then the suggested filename became “Container.csv.” Another good lesson.
Odd, I can only assume I changed that after I’d uploaded the demo. Sorry about that.
Still, a useful learning point arises. Above is where you can preset the filename and or extension used for export. Both are stored as attributes, like much in Tinderbox.
One message earlier I sent a graphic of the Export Inspector’s Export pane that showed the template as /Templates/TSV page. When I put together the file I sent to you I added the TSV Page and TSV-item entries in the Template container just following atbref9. At this point I’m wondering, if no TSV export is needed, then is it ok to change the “Template:” field for “Container” to /Templates/CSV Page, leave the “Extension:” as .html and to clean up the file by deleting the TSV Page and TSV-item notes in the Templates Container? I notice that every file, where they have a file extension shown in the Export Inspector’s Export pane, with one exception (CSV Export Agent which uses a .csv extension) has an .html extension. Assuming this is because TB uses .html as the language of its notes until the conversion process to .csv?
[quote=“tarkine, post:18, topic:4109”]
At this point I’m wondering, if no TSV export is needed, then is it ok to change the “Template:” field for “Container” to /Templates/CSV Page[/quote]
Yes, if you want the container called “Container” to export it’s children’s data as Tab-delim to set it (see Inspector image in the post above) to “/Templates/TSV-page” and alter the extension box to “.tsv” or to “.txt”. For CSV export, it is that easy to configure set the same setting to “/Templates/CSV-page” and alter the extension box to “.csv”.
It’s difficult, if i don’t show multiple methods, people assume only one can be defined at a time. If I show notes configured to use different exports, they may assume these are some how fixed. It’s actually much more flexible.
The template you select for a note/container/agent simply sets the form(at) of the export. The template does not directly control the filename or file-extension. These can be set via the Export Inspector or—see the link—set via the attributes linked to those boxes on the Export Inspector.
No. It’s more simple. The default for $HTMLExportExtension is “.html” because the most normal of Export (previously termed HTML export) was to generate HTML. If you beed it to be different you can either set the $HTMLExportExtension for the not(e) being exported, or select a different extension in the file save dialog when using ‘Export selected note’. Configure (and change) the extension as you need.
IOW, switch your thinking around from “does the app let me”. Unless told otherwise, the app will use best guess defaults for thinks like (HTML) Export filename extensions. If you know you need different values, just set the relevant attribute value for the relative note(s).
Native Tinderbox export is marvelously adaptable to different formats. It can do just about anything.
But for simple export of CSV (character-separated values) to other apps you might also consider the AppleScript below, which requires no setup of export templates, etc. Nor does it require AppleScript skills. Just select the notes you want to export and click run.
I selected the notes (actually one note) in the sample Tinderbox document, ran the script and at the prompt typed this in the box:
Name StartDate EndDate Domain FalsePremise Pretext Goal ,
This placed the data on the clipboard.
Then I clicked in a spreadsheet cell, pasted with command-v and saved the file with the desired extension. I could also have pasted into a text editor and done the same.
Need other attributes, or a different order, a different delimiter? No problem. Just rerun and at the prompt change the entry in the box.
Want to export from another Tinderbox document? No problem. You can save it in the Script Menu so it’s just a menu pick away. It’s like running a stamp. But unlike a stamp you don’t have to recreate it or copy it each time you switch to another Tinderbox document.
The script is here (click the triangle to reveal):
Export selected notes to CSV script
# Places quoted character-separated values (CSV) on clipboard for pasting wherever.
# v. 1.2 -- includes simple date conversion and "edit the box" dialog

property entryString : "Name Text NoteURL t"

set dialogText to "Export selected notes from Tinderbox to the system clipboard in a csv (character-separated value) format for pasting into spreadsheets or other applications." & return & return & "1. Select notes in Tinderbox. Non-contiguous multi levels ok." & return & return & "2. Edit the box below to choose Tinderbox attributes in the order that you want them to appear in the spreadsheet. Spell their names exactly. Add/delete/reorder as needed. Use one or more spaces between names." & return & return & "3. After the last attribute name enter one or more spaces followed by the delimiter to be used to separate items in the exported csv." & return & return & "4. Click 'Continue' to export to the clipboard for pasting. " & return & return & "                  ------------------------" & return & return & "For the delimiter enter a single character:" & return & return & "   t  for tab" & return & "   ,  for comma" & return & "   ;  for semicolon" & return & "   |  for pipe" & return & "           and so on..." & return & return & "Examples of valid entries in the box:" & return & return & "   Name MyString Path Text ," & return & "   Name MyString MyDate MySet Text ;" & return & "   Name  Text MySet MyString MyDate   ;" & return & "   Name   Text   MyString   NoteURL       t" & return

set theResponse to display dialog dialogText default answer entryString buttons {"Cancel", "Continue"} default button "Continue" with title "Tinderbox Export to Spreadsheet"

set entryString to trimRight(text returned of theResponse)

tell entryString
	if character -2 is not " " then error "Can't find a delimiter at end."
	set myDelimiter to last character
	if myDelimiter is "t" then set myDelimiter to tab
	set grabAttribs to words of text 1 thru -2 --if "t" present ignore as last "word"
end tell

--  NO USER TINKERING NEEDED BELOW THIS LINE, at least in theory;)

set text item delimiters to quote & myDelimiter & quote

# create separate list to hold lists of attribute values (a "list of lists")
copy grabAttribs to attribVals

set numCols to grabAttribs's length

tell application "Tinderbox 9"
	tell front document's selections -- (note use of plural)
		repeat with i from 1 to numCols
			set attrName to grabAttribs's item i
			tell attribute attrName
				# add list of this attribute's values to the list of lists
				set attribVals's item i to value
				# if attribute is date then convert format
				if item 1's type is "date" then copy my convertDates(attribVals's item i) to attribVals's item i
			end tell
			# adds list of this attribute's values to the list of lists
		end repeat
	end tell
end tell

set numRows to attribVals's item 1's length

set outStr to quote & (grabAttribs as string) & quote & return # header row

repeat with i from 1 to numRows
	set rowItems to {}
	repeat with j from 1 to numCols
		set rowItems's end to attribVals's item j's item i
	end repeat
	set outStr to outStr & quote & (rowItems as string) & quote & return # body row
end repeat

set the clipboard to outStr

display notification "Tinderbox data ready for pasting."

--return outStr -- uncomment this line to view output in Script Editor 'Result' pane

#### handlers (similar to subroutines or functions in other languages) ####

to convertDates(listOfIsoDates)
	-- convert list of Tinderbox ISO 8601 dates to spaced date-time string for spreadsheets
	set convertedDates to {}
	repeat with i from 1 to listOfIsoDates's length
		tell listOfIsoDates's item i
			if it is "never" then
				set convertedDates's end to ""
			else
				set convertedDates's end to its text 1 thru 10 & " " & text 12 thru 19
			end if
		end tell
	end repeat
	return convertedDates
end convertDates

to trimRight(someText)
	-- removes any spaces at end of a string
	repeat until someText does not end with " "
		set someText to text 1 thru -2 of someText
	end repeat
	return someText
end trimRight
To run it copy-paste it into Script Editor (in Applications > Utilities), select the notes to export and click the run button. Then paste the results wherever. If “nothing happens” make sure Script Editor is listed and checked at System Preferences > Security & Privacy > Privacy > Accessibility.
3 Likes